
Cosco Scenera Car Seat: A Comprehensive Guide
Welcome! This guide provides essential instructions for safely utilizing your Cosco Scenera car seat, ensuring your child’s protection during every journey.
The Cosco Scenera car seat is a popular choice for parents seeking an affordable, yet reliable, safety solution for their little ones. Known for its compact design and ease of use, the Scenera is designed to protect children ranging from 22 to 40 pounds in rear-facing mode, and 40 to 50 pounds in forward-facing mode.
This car seat prioritizes simplicity without compromising on safety standards. It’s a particularly good option for families who need a lightweight seat for travel or for those with multiple car seats to rotate between vehicles. Before using the Scenera, it’s crucial to thoroughly read this instruction manual and understand all its features and limitations.
Proper installation and correct harnessing are paramount to ensuring your child’s safety. This guide will walk you through each step, from understanding the different models to mastering the installation process and ensuring a secure fit. Remember, a properly installed car seat can significantly reduce the risk of injury in the event of a collision.
Key Features & Benefits
The Cosco Scenera boasts several key features designed for both parent convenience and child safety. Its lightweight construction – typically under 13 pounds – makes transferring the seat between vehicles a breeze. The Scenera also includes robust side impact protection, engineered to help absorb and deflect energy away from your child during a collision.
A five-point harness system securely holds your child in place, distributing crash forces across the strongest parts of the body. The Scenera’s design prioritizes ease of adjustment, allowing you to quickly and efficiently customize the fit as your child grows. Beyond safety, the Scenera offers exceptional value, providing essential protection at an accessible price point.
These features combine to create a car seat that’s not only safe and reliable but also practical for everyday use. Understanding these benefits will help you maximize the Scenera’s effectiveness and ensure your child travels securely.
Lightweight & Portable Design
One of the most appreciated aspects of the Cosco Scenera is its remarkably lightweight design, typically weighing less than 13 pounds. This makes it exceptionally easy to move the car seat between different vehicles – a significant benefit for parents who share driving responsibilities or frequently switch cars. The Scenera’s compact size further enhances its portability, allowing it to fit comfortably in smaller vehicles.
The integrated carrying handle is strategically positioned for a balanced and comfortable grip, simplifying transport even when the seat is installed with your child inside. This feature is particularly useful when traveling or needing to quickly move the seat for cleaning or adjustments.
Despite its lightweight nature, the Scenera doesn’t compromise on structural integrity or safety. It’s built to meet or exceed all applicable safety standards, providing reliable protection while remaining conveniently portable.
Side Impact Protection
The Cosco Scenera car seat incorporates thoughtfully designed features to enhance side impact protection, a crucial safety element in the event of a collision. The seat boasts extended side wings that cradle your child’s head, neck, and torso, providing an extra layer of cushioning and support. These wings are engineered to help distribute impact forces away from your child’s vital areas.
The energy-absorbing foam lining within the headrest and side wings further contributes to impact reduction. This specialized foam compresses upon impact, absorbing and dissipating energy to minimize the forces transmitted to your child.
While no car seat can completely eliminate the risk of injury, the Scenera’s side impact protection features significantly improve your child’s safety profile in a side-impact event, offering parents increased peace of mind during travel.
Five-Point Harness System
The Cosco Scenera car seat utilizes a robust five-point harness system, considered a gold standard in child restraint safety. This system secures your child at five critical points – across both shoulders, the hips, and between the legs – distributing crash forces across the stronger parts of the body.
Proper harness adjustment is paramount. The harness straps must be snug enough that you cannot pinch any excess webbing at your child’s shoulder. Ensure the chest clip is positioned at armpit level, promoting optimal force distribution during a collision.
Regularly check the harness for wear and tear, and always replace it if any damage is detected. Never add padding or aftermarket products to the harness, as these can compromise its effectiveness. A correctly fitted five-point harness significantly minimizes the risk of your child being ejected from the seat during a crash.
Understanding the Scenera Models
Cosco has released several iterations of the Scenera car seat, with the Scenera Next being the most current model. While both the Scenera Next and the original Scenera prioritize safety, there are key differences to note. The Scenera Next generally features updated fabrics, slightly increased weight limits, and enhanced ease of installation.
However, both models meet or exceed all applicable safety standards. Determining your specific model year is crucial for accessing the correct instruction manual and ensuring proper usage. The model number and manufacturing date are typically located on a label affixed to the car seat’s base or back.

Always refer to the manual corresponding to your specific Scenera model for accurate guidance on weight limits, installation procedures, and harness adjustments. Using information from an incorrect manual could compromise your child’s safety.
Scenera Next vs. Original Scenera
Distinguishing between the Scenera Next and the original Scenera is vital for correct usage. The Next model boasts a slightly more streamlined design and often incorporates improved fabric textures for enhanced comfort. A key difference lies in the harness height adjustment system; the Scenera Next typically features a simpler, no-rethread system.
Weight limits also vary subtly. While both accommodate infants and toddlers, the Scenera Next generally allows for a slightly higher maximum weight in both rear-facing and forward-facing modes. Installation may also feel more intuitive with the Next, due to refined LATCH connectors and belt routing.
However, functionally, both seats provide excellent protection. Always consult the specific instruction manual for your model to confirm weight and height limits, and to understand the unique features of your Scenera car seat. Don’t assume compatibility based solely on visual similarities.

Identifying Your Model Year
Determining your Cosco Scenera’s model year is crucial, as instructions and weight limits can differ. Locate the manufacturing date sticker – typically found on the underside of the seat shell, or on the back. This sticker displays the month and year of production. Important: the date of purchase is not the same as the manufacturing date!
Referencing the manufacturing date against Cosco’s online resources or contacting their customer support will pinpoint your specific model year. Different years may have minor design updates or revised safety standards incorporated. Always use the instruction manual corresponding to your seat’s manufacturing date.
If you cannot locate the sticker, contacting Cosco directly with the seat’s serial number (also found on the underside) is the best course of action. Using outdated or incorrect instructions could compromise your child’s safety. Prioritize accurate information for proper installation and usage.
Installation – Rear-Facing Mode
Rear-facing is the safest position for infants and young toddlers. Before beginning, review weight and height limits for rear-facing use in your specific Scenera model’s manual. Ensure the vehicle seat is compatible; not all vehicles accommodate rear-facing installation.
Choose between using the LATCH system or the vehicle’s seat belt for installation. The LATCH system offers a secure connection, but always verify a tight fit. If using the seat belt, route it correctly according to the manual’s diagrams. Crucially, never install the car seat in the front seat with an active airbag.
Pay close attention to recline angle indicators. The Scenera must be installed at the correct recline to ensure proper head and spine support for your child. Double-check all connections and ensure minimal side-to-side or front-to-back movement. A secure installation is paramount for safety.
LATCH System Installation
Locate the lower anchor connectors in your vehicle’s seat bight (where the seat back and cushion meet). Attach the Scenera’s lower anchor connectors to these points, ensuring a positive click sound confirms a secure connection. Next, route the top tether strap (if applicable for your model and vehicle) to the designated anchor point in your vehicle – consult your vehicle manual for its location.
Tighten the LATCH straps incrementally, alternating between both sides, to achieve a snug fit. The car seat should not move more than one inch side-to-side or front-to-back when tested at the belt path. Remember, the tether strap significantly reduces forward movement in a crash, so its use is highly recommended when possible.
Verify the installation by firmly grasping the car seat near the belt path and attempting to move it. If excessive movement exists, re-check connections and tighten straps further. A properly installed LATCH system provides a reliable and convenient installation method.
Seat Belt Installation – Rear-Facing
Begin by placing the Scenera car seat rear-facing in your vehicle. Route the vehicle’s seat belt through the correct belt path on the car seat – refer to the diagram on the seat itself or in this manual. Ensure the seat belt lies flat and isn’t twisted. Buckle the seat belt and firmly press down on the car seat while pulling the shoulder belt to remove any slack.
To tighten the seat belt, you may need to kneel in the vehicle seat and apply your weight to the car seat while pulling the shoulder belt tight. The car seat should not move more than one inch side-to-side or front-to-back when tested at the belt path. Locking the seat belt is crucial; consult your vehicle manual for locking instructions – often achieved by pulling the belt all the way out.
Finally, double-check the installation, verifying a secure fit and proper belt path. A correctly installed rear-facing car seat is vital for your child’s safety.
Recline Angle Indicators & Adjustment
Maintaining the correct recline angle is essential for infant safety in a rear-facing car seat. The Cosco Scenera features built-in recline indicators to help you achieve the proper angle. Locate these indicators – typically a line or series of lines – on the side of the car seat.
To adjust the recline, you’ll find a recline mechanism usually located at the base of the seat. Follow the instructions printed near the mechanism to adjust the angle. Ensure the indicator aligns with the designated “safe zone” marked on the car seat. This zone confirms the seat is reclined at an angle suitable for an infant’s airway.
Always verify the recline angle after installation and periodically throughout use. An incorrect angle can compromise your child’s safety. Refer to the diagrams in this manual for visual guidance on proper recline adjustment.
Installation – Forward-Facing Mode
Transitioning to forward-facing mode requires careful attention to ensure continued safety. Before beginning, confirm your child meets the weight and height requirements specified in this manual. Remove the rear-facing recline adjustment and ensure it’s securely locked in the forward-facing position.
The Cosco Scenera can be installed forward-facing using either the LATCH system or the vehicle’s seat belt. Always prioritize the LATCH system if your vehicle permits it, as it generally provides a more secure installation. However, seat belt installation is a viable alternative when LATCH weight limits are exceeded or unavailable.
Detailed instructions for both LATCH and seat belt installations are provided in the following sections. Remember to always utilize the top tether strap when installing forward-facing; it significantly reduces head excursion in a crash. Double-check all connections before each journey.
LATCH System Installation – Forward-Facing
To install the Scenera forward-facing using the LATCH system, first locate your vehicle’s lower anchors. Attach the car seat’s lower anchor connectors to these points, ensuring a positive click on both sides. Next, route the top tether strap to the designated anchor point in your vehicle – consult your vehicle owner’s manual for its location.
Tighten the LATCH straps incrementally, alternating between sides, until the car seat is installed firmly and does not move more than one inch side-to-side or front-to-back. Crucially, ensure the tether strap is snug; it minimizes forward movement in a collision. Verify the seat is level using a bubble level if available.
Always refer to both the Scenera instruction manual and your vehicle’s owner’s manual for specific LATCH weight limits and anchor point locations. A secure LATCH installation is paramount for your child’s safety. Regularly check the tightness of the straps.
Seat Belt Installation – Forward-Facing
For forward-facing installation using the vehicle seat belt, first position the Scenera car seat in the vehicle. Thread the vehicle’s seat belt through the designated belt path on the car seat, ensuring it’s properly routed according to the manual’s illustrations. Buckle the seat belt and firmly press down on the car seat while pulling the shoulder belt to remove any slack.
To tighten the installation, you may need to kneel in the vehicle seat and apply your weight to the car seat while pulling the seat belt tight. Remember to also utilize the top tether strap, connecting it to the appropriate anchor point in your vehicle. A snug seat belt and properly tightened tether are vital.
Confirm the car seat doesn’t move more than one inch side-to-side or front-to-back. Always consult both the Scenera manual and your vehicle’s manual for specific instructions and weight limits. Regular checks are essential for continued safety.
Top Tether Usage & Importance
The top tether strap is a crucial safety feature when using the Cosco Scenera in forward-facing mode. It significantly reduces head excursion during a crash, minimizing the risk of injury to your child. Locate the tether anchor point in your vehicle – it’s usually on the vehicle seat, the rear shelf, or a designated post.
Attach the tether strap to the anchor point, ensuring it’s securely fastened. Tighten the tether strap until there is no slack. A properly tightened tether will limit forward movement of the car seat during a collision. Never use the car seat forward-facing without engaging the top tether.
Always refer to both the Scenera instruction manual and your vehicle’s owner’s manual for specific tether anchor point locations and weight limits. Regularly inspect the tether strap for any signs of wear or damage. Prioritize tether usage for optimal child safety.
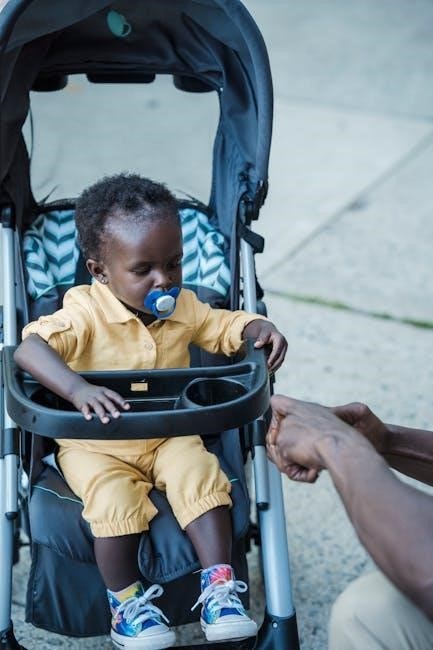
Harnessing Your Child Correctly
Proper harnessing is paramount for your child’s safety in the Cosco Scenera. Ensure your child is seated snugly against the car seat’s backrest before securing the five-point harness. Begin by placing the bottom crotch strap as low as possible, ensuring it rests comfortably on your child’s upper thighs – never their abdomen.
Next, thread the shoulder straps through the appropriate height slots, corresponding to your child’s shoulder level. The straps should lie flat against your child’s shoulders and chest, without any twists. Secure the harness buckle, listening for a distinct click. Finally, perform the “pinch test” to verify tightness.
You should be unable to pinch any excess webbing at your child’s shoulder. If you can pinch webbing, tighten the harness further. Remember to adjust the harness as your child grows, maintaining the correct shoulder strap height and snug fit. Consistent and correct harnessing is vital.
Shoulder Strap Height Adjustment
Adjusting the shoulder strap height is crucial as your child grows with the Cosco Scenera. Locate the harness strap slots on the car seat’s back. To raise the straps, simultaneously depress the red release buttons located near the top of each slot and reposition the straps to the next higher set of slots. Ensure both sides are adjusted to the same height.
For rear-facing mode, the straps should be positioned at or below your child’s shoulders. As you transition to forward-facing, adjust the straps so they are at or above your child’s shoulders. Proper positioning ensures optimal impact distribution during a collision. Regularly check the strap height – every few months, or whenever your child experiences a growth spurt.
Incorrect strap height compromises safety. Too low, and your child could slide out of the harness. Too high, and the straps may not effectively restrain them. Always refer to the car seat’s markings for guidance.
Crotch Strap Positioning
Correct crotch strap positioning is vital for maximizing the Cosco Scenera’s safety features. The crotch strap should always lie snugly against your child’s upper thighs, not across their abdomen. To adjust, locate the crotch strap buckle and slide it up or down through the designated slot in the car seat shell.
Ensure the strap is flat and not twisted. A properly positioned crotch strap helps prevent submarining – where a child slides down under the harness during a crash. For younger children, or those with limited mobility, ensuring a comfortable yet secure fit is paramount. Avoid overtightening, which can cause discomfort, but ensure it’s snug enough to prevent excessive movement.
Regularly check the crotch strap position, especially after adjusting the shoulder straps. Improper positioning can significantly reduce the car seat’s effectiveness. Always consult the car seat’s illustrations for visual guidance.
Tightness Checks – The Pinch Test

After securing the five-point harness, perform the “Pinch Test” to verify proper tightness. This simple check ensures the harness straps are snug enough to restrain your child effectively during a collision. To perform the test, firmly pinch the harness strap at your child’s shoulder.
If you can pinch any excess webbing between your fingers, the harness is too loose and needs tightening. Continue adjusting the harness straps until you can no longer pinch any webbing. Repeat this test at both shoulders to ensure even tightness. Remember, a snug fit is crucial, but avoid overtightening, which can cause discomfort.
The Pinch Test is a quick and reliable way to confirm a secure harness fit. Always perform this check before each journey, and after making any adjustments to the harness or car seat. Consistent checks are vital for your child’s safety.
Cleaning & Maintenance
Regular cleaning maintains hygiene and extends the life of your Cosco Scenera car seat. For routine cleaning, wipe down the plastic shell with a damp cloth and mild soap. Avoid harsh chemicals or abrasive cleaners, as these can damage the material. The fabric cover is removable for more thorough cleaning.
To remove the cover, follow the instructions in your manual – typically involving releasing elastic straps or buckles. Machine wash the fabric cover in cold water on a gentle cycle, using a mild detergent. Air dry the cover completely before reinstalling it onto the car seat. Never place the plastic shell in the washing machine;
Periodically inspect the car seat for any damage or wear. Ensure all buckles, straps, and connectors are functioning correctly. Proper maintenance ensures continued safety and reliability.
Fabric Cover Removal & Washing
Removing the Cosco Scenera’s fabric cover allows for thorough cleaning, maintaining hygiene for your child. Begin by ensuring the car seat is completely empty and uninstalled from the vehicle. Locate the elastic straps or buckle attachments securing the cover – these vary slightly by model year, so consult your specific manual.
Gently detach these fasteners, working your way around the cover. Once free, carefully lift the cover off the car seat frame. For washing, turn the cover inside out to protect the outer fabric. Use a washing machine with cold water and a mild, liquid detergent. Select a gentle cycle to prevent damage.
Avoid using bleach or fabric softeners. After washing, air dry the cover completely – do not tumble dry, as heat can shrink or warp the material. Ensure it’s fully dry before reinstalling to prevent mildew.
Shell Cleaning & Disinfection
Maintaining a clean car seat shell is crucial for hygiene, even after removing the fabric cover. Begin by wiping down the entire plastic shell with a damp cloth and mild soap solution. Pay close attention to crevices and areas where crumbs or spills may accumulate. For stubborn stains, a gentle all-purpose cleaner can be used, but always test it on an inconspicuous area first.
To disinfect, create a solution of water and a small amount of baby-safe disinfectant – follow the disinfectant’s instructions carefully. Apply this solution with a clean cloth, ensuring all surfaces are covered. Avoid spraying directly onto the car seat. Wipe away any excess liquid with a dry cloth.
Never submerge the car seat shell in water. Ensure the shell is completely dry before reinstalling the fabric cover or using the car seat. Regular cleaning helps prevent the buildup of bacteria and keeps your child safe.
Safety Reminders & Warnings
Always register your Cosco Scenera car seat to ensure you receive recall notifications. Never leave your child unattended in the car seat. Do not modify the car seat in any way, as this could compromise its safety features. Ensure the car seat is properly installed and tightened before each use.
Replace the car seat after any collision, even if there is no visible damage. Check the expiration date printed on the car seat – do not use it past this date. Avoid using aftermarket products not approved by Cosco. Regularly inspect the harness straps and buckles for wear and tear.
Keep this instruction manual readily available for future reference. Understand the limitations of the car seat and follow all weight and height restrictions. Prioritize your child’s safety above all else when traveling.
Troubleshooting Common Issues
Difficulty installing? Double-check the LATCH connectors are securely attached and the seat belt is locked. Harness straps too loose? Ensure they are pulled tightly and the pinch test passes. Recline angle incorrect? Adjust the recline mechanism until the indicator aligns properly.
Buckle won’t release? Gently wiggle the buckle tab while pressing the release button. Car seat feels unstable? Retighten the installation using either LATCH or the seat belt. Fabric cover won’t remove? Consult the cleaning & maintenance section for detailed instructions.
If issues persist, review the installation instructions carefully or contact Cosco customer support for assistance. Do not continue using the car seat if you cannot resolve a safety-related problem. Remember, a properly functioning car seat is crucial for your child’s safety.