Cooking Checkers frozen fries in an air fryer is a game-changer for achieving crispy‚ restaurant-quality results at home․ This method offers a healthier alternative to deep frying‚ requiring minimal effort and less oil․ Perfect for fast-food lovers‚ it delivers flavorful fries with ease!
Benefits of Using an Air Fryer for Checkers Fries
Using an air fryer to cook Checkers frozen fries offers numerous benefits․ It requires minimal oil‚ making it a healthier alternative to deep frying while still achieving crispy results․ The air fryer ensures even cooking and retains the signature seasoning of Checkers fries․ Cooking times are faster compared to traditional oven methods‚ typically taking 15-20 minutes․ The process is mess-free‚ with no splattering oil‚ and cleanup is effortless․ Additionally‚ the air fryer allows for perfect crispiness without constant monitoring‚ making it a convenient option for busy households․ It also preserves the fluffy interior of the fries‚ delivering a texture close to restaurant-quality․ Overall‚ the air fryer enhances the flavor and convenience of enjoying Checkers fries at home․
Ingredients Needed
Cooking Checkers fries in an air fryer requires minimal ingredients‚ making it a simple and convenient process․ The primary ingredient is a bag of Checkers frozen seasoned fries‚ which are specifically designed to deliver that classic restaurant taste․ No additional seasoning is necessary‚ as the fries are pre-seasoned․ However‚ for extra flavor‚ you can lightly spray the fries with a small amount of oil‚ such as avocado oil or olive oil‚ before cooking․ Additionally‚ optional toppings like shredded cheese‚ bacon bits‚ or a drizzle of your favorite sauce can be added after cooking for extra deliciousness․ The beauty of this recipe lies in its simplicity‚ allowing you to enjoy crispy‚ flavorful fries with minimal effort and ingredients․
Essential Tools and Equipment
To successfully cook Checkers fries in an air fryer‚ you’ll need a few essential tools and pieces of equipment․ First and foremost‚ an air fryer is the star of the show․ Popular models like the Ninja‚ Philips‚ or Cosori air fryer work perfectly for this recipe․ A spatula is also necessary for flipping the fries halfway through the cooking process to ensure even browning․ Additionally‚ a pair of tongs can be helpful for tossing the fries gently to redistribute them in the basket․ If you want to achieve extra crispiness‚ a light cooking spray‚ such as olive oil or avocado oil‚ can be used to mist the fries before cooking․ A bowl for tossing the fries (if needed) and paper towels for patting dry excess moisture are also useful․ Lastly‚ a serving tray or paper cones can be handy for presenting your perfectly cooked fries․ These tools ensure a seamless and enjoyable cooking experience․
Step-by-Step Instructions
- Preheat the air fryer to 400°F (200°C) for 3-5 minutes․
- Add the frozen Checkers fries to the basket in a single layer․
- Cook for 15 minutes‚ flipping halfway with a spatula for even crispiness․
- Remove and season if desired before serving․
5․1 Preheating the Air Fryer
Preheating your air fryer is a crucial first step to ensure your Checkers fries cook evenly and achieve the perfect crispiness․ Set the air fryer to 400°F (200°C) and let it preheat for about 3-5 minutes․ This allows the appliance to reach a consistent temperature‚ which is essential for optimal cooking results․ During this time‚ you can prepare the fries by removing them from the freezer or packaging․ Once preheated‚ the air fryer is ready to cook the fries efficiently․ Skipping this step may lead to undercooked or unevenly cooked fries‚ so it’s important not to rush this process․ Ensure the air fryer is hot before adding the fries to maximize crispiness and flavor․
5․2 Adding Fries to the Basket
Once the air fryer is preheated‚ carefully pour the frozen Checkers fries into the air fryer basket in a single layer․ Avoid overcrowding the basket‚ as this can prevent even cooking and reduce crispiness․ If necessary‚ pat the fries dry with a paper towel to remove excess moisture‚ which helps achieve a crisper texture․ Do not defrost the fries before adding them to the basket‚ as they are designed to cook straight from the freezer․ Ensure the fries are spread out evenly‚ allowing air to circulate freely around each piece․ If the basket is too full‚ cook the fries in smaller batches to maintain optimal results․ Properly arranging the fries in the basket is essential for achieving the perfect balance of crunch and flavor․
5․3 Cooking the Fries
Set the air fryer to 400°F (200°C) and cook the fries for 10-15 minutes‚ depending on their thickness and your desired crispiness․ Shake the basket halfway through the cooking time to ensure even browning․ For extra crispiness‚ you can extend the cooking time by 2-3 minutes․ Keep an eye on the fries during the last few minutes to prevent overcooking․ Thin fries may cook faster than thicker ones‚ so adjust the time accordingly․ Once the fries are golden brown and crispy‚ they’re ready to be served․ If needed‚ cook in batches to maintain even cooking․ Proper cooking ensures a crispy exterior and a fluffy interior‚ just like restaurant-quality fries․
5․4 Flipping the Fries
Flipping the fries is a crucial step to ensure even cooking and crispiness․ After the first 7-8 minutes of cooking‚ carefully remove the basket from the air fryer․ Use tongs or a spatula to gently flip the fries‚ ensuring they are evenly distributed in the basket․ This step allows all sides of the fries to come into contact with the hot air‚ promoting uniform browning and crispiness․ For optimal results‚ avoid overcrowding the basket‚ as this can hinder air circulation and prevent even cooking․ If desired‚ you can lightly spritz the fries with a small amount of oil for extra crispiness before flipping․ Once flipped‚ return the basket to the air fryer and continue cooking for the remaining time․ Flipping ensures that the fries do not stick together and that each piece achieves the perfect texture—crispy on the outside and fluffy on the inside․
Tips for Achieving Perfect Crispiness
For perfect crispiness‚ lightly spray fries with oil before cooking․ Arrange them in a single layer‚ shake halfway‚ and avoid overcrowding․ Adjust temperature as needed for even results․
6․1 Optimal Temperature Settings
Achieving the perfect crispiness in your Checkers fries begins with the right temperature․ Preheat your air fryer to 400°F (200°C) for optimal results․ Cooking at this temperature ensures a golden-brown exterior while maintaining a fluffy interior․ For extra crispiness‚ you can increase the temperature to 420°F (220°C) during the last 2-3 minutes of cooking․ However‚ avoid overheating‚ as it can burn the fries․ If you prefer a softer texture‚ reduce the temperature to 380°F (193°C)․ Always preheat the air fryer for 2-3 minutes before adding the fries to ensure even cooking․ Adjusting the temperature based on your desired crispiness level will help you achieve the perfect outcome every time․ Remember‚ the key is to balance heat and cooking time for restaurant-quality results at home․

6․2 The Importance of Flipping
Flipping your Checkers fries halfway through the cooking process is crucial for achieving even cooking and crispiness․ This step ensures that all sides of the fries are exposed to the hot air‚ preventing some areas from being undercooked while others become overly crispy․ Neglecting to flip can result in uneven texture‚ with some fries remaining soft while others burn․ For optimal results‚ flip the fries at the 7-minute mark when cooking at 400°F (200°C) for 15 minutes․ This allows the fries to develop a golden-brown color and a crunchy exterior․ If you’re cooking in batches‚ flipping also helps redistribute the fries for consistent cooking․ Remember‚ flipping is a simple yet essential step that makes a significant difference in the final outcome of your air-fried Checkers fries․ Don’t skip this step for the best results!

Recommended Cooking Times
Cooking Checkers frozen fries in an air fryer typically takes between 10 to 20 minutes‚ depending on the thickness of the fries and your desired level of crispiness․ For optimal results‚ preheat the air fryer to 400°F (200°C) and cook the fries for 15-20 minutes․ Shake the basket halfway through the cooking time to ensure even cooking․ If you prefer a crisper texture‚ you can extend the cooking time by 2-3 minutes․ For thinner fries‚ 10-12 minutes may be sufficient‚ while thicker fries may require up to 18 minutes․ Always check the fries during the last few minutes of cooking to avoid burning․ Adjust the cooking time based on your personal preference and the specific model of your air fryer․ This ensures perfectly cooked‚ golden-brown Checkers fries every time!
Additional Recipe Ideas
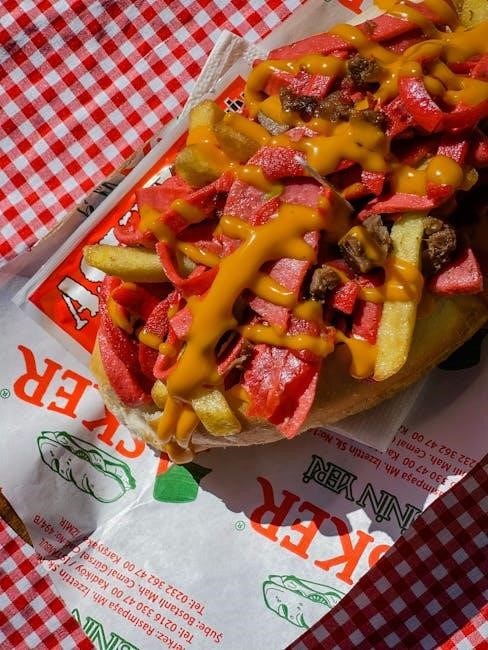
Enhance your Checkers fries with creative toppings! Try loaded fries topped with shredded cheese‚ crispy bacon‚ and chives․ For a twist‚ air-fry the fries‚ then transfer them to a cast iron skillet‚ add queso‚ and bake until bubbly․ Delicious!
8․1 Loaded Checkers Fries
Take your Checkers fries to the next level with a loaded twist! After air frying the fries to crisp perfection‚ transfer them to a cast iron skillet or oven-safe dish․ Sprinkle shredded queso‚ diced bacon‚ and chives generously over the top․ Bake in a preheated oven at 350°F for 5-6 minutes‚ or until the cheese is melted and bubbly․ For extra flavor‚ drizzle with a bit of ranch dressing or hot sauce․ This indulgent dish is perfect for game days‚ movie nights‚ or satisfying your cravings․ The combination of crispy fries‚ creamy cheese‚ and smoky bacon creates a mouthwatering treat that’s sure to impress․ Serve immediately and enjoy the ooey-gooey goodness!
Cooking Checkers fries in an air fryer is a simple and efficient way to enjoy crispy‚ flavorful fries at home․ This method eliminates the need for deep frying‚ making it a healthier and less messy alternative․ With minimal prep and quick cooking times‚ you can achieve restaurant-quality results in just a few steps․ Whether you’re a fan of classic fries or want to get creative with loaded toppings‚ the air fryer delivers perfectly cooked fries every time․ Its versatility and ease of use make it a must-have kitchen appliance for anyone who loves crispy‚ golden fries without the hassle of traditional frying․ Give this method a try and enjoy your favorite Checkers fries with a modern twist!